
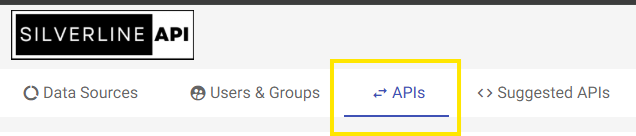
Navigate to the the APIs tab.
Click on New API button to the right hand top.

Select desired data source (here we have selected Car Dealership) and click on OK
API Wizard:

Enter a question based on your API requirement. For Example – “Show me all the cars available in the inventory, including their manufacturer, model, year, price and color” (we can also write the query manually).

Query generated in the query panel (we can also manually modify the query or continue using the chat box asking to further refine the results).

Click on the Execute Query button and validate your response.

Once executed. Provide an API Name and click ‘Save’. When ready to go live click on ‘Publish’.

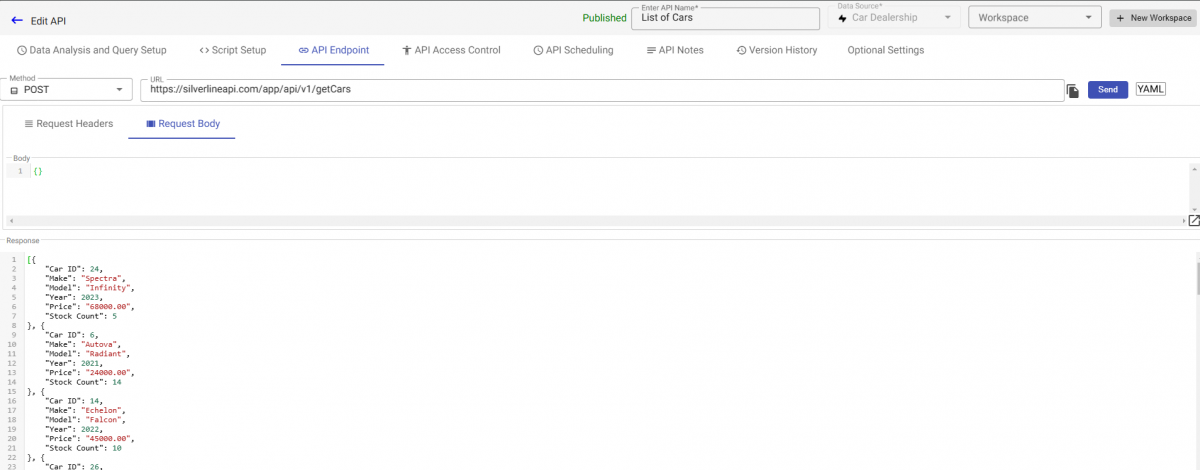
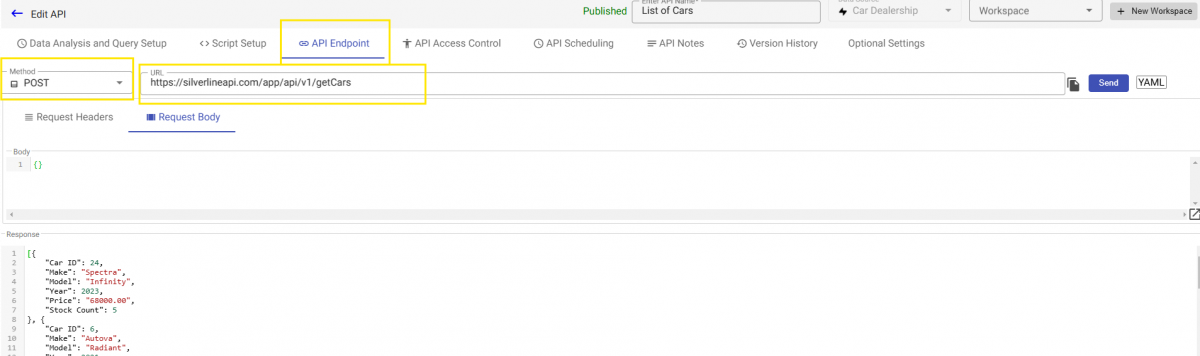
After saving, you will see additional tabs. Navigate to the API Endpoint tab and click ‘Send’ to test your API. You can provide your API a friendly route name by going to the ‘Optional Settings‘ tab (In this example, we have assigned a friendly route name to the API: getCars.)
Script Setup :
Silverline API enables adding business logic to query results from the Data Analysis and Query Setup tab or building an entire API using the Script Setup feature. Python scripts can be generated using natural language in the chat box, similar to query creation in the Data Analysis and Query Setup tab, or written manually.
Query outputs can be used in scripts, and script outputs can be used in queries, ensuring seamless data integration.
For more details, refer to the Data Queries and Scripts documentation.
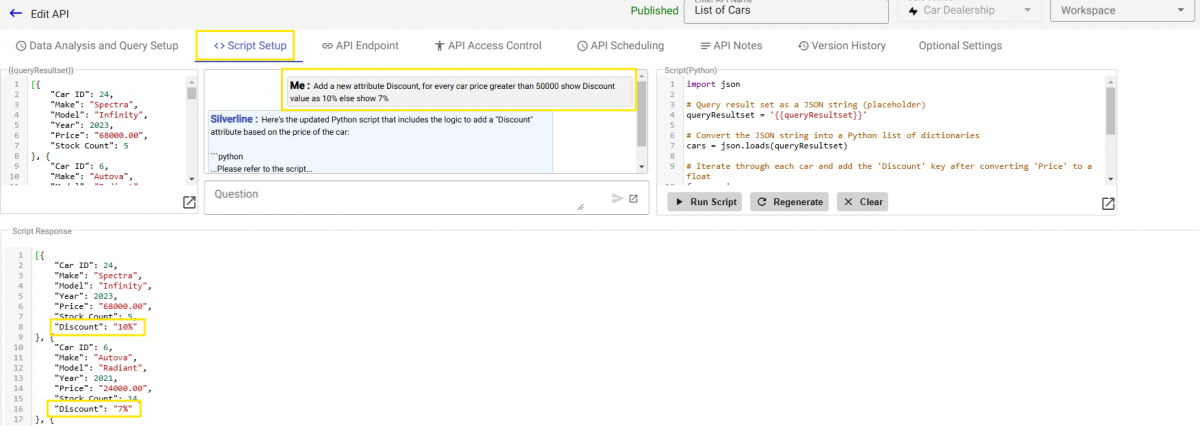
Script Example:
We need to add a “Discount” attribute where cars priced above 50,000 get a 10% discount, and all others get 7%.
Using natural language, enter:
“Add a new attribute ‘Discount’ where price > 50,000 gets 10% and others get 7%.”
Silverline API will generate the Python script automatically (we can also write the code manually if needed).
[Note: In this example, the queryResultset parameter holds the value from the Data Analysis and Query Setup tab. The result set from that tab can be referenced in scripts using the {{queryResultset}} parameter.]
[Tip: If an error occurs, copy it into the chat box and re-execute. The regenerated code will usually fix the issue.]
The final API endpoint can be copied from API Endpoint Tab.

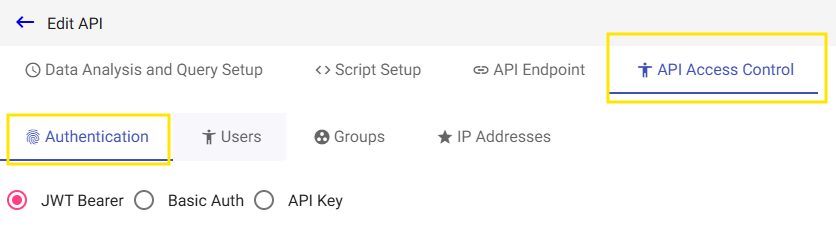
Authentication :
Navigate to the API Access Control ,You can select who should have access to the API here. You can also select one of the three authentication methods. JWT Token based, Basic Authentication and API key based. (Read more about using each authentication type, along with examples, in the API Access Control document, under Authentication category)
Publish the API. Once published, a version will be automatically created for you under the Version History tab.
[Important: Only published APIs can be executed outside the Silverline API application. Ensure that your request headers include Content-Type: application/json.]
We can configure the desired API method and copy our API endpoint from the API Endpoint tab as shown below.
Save as Draft vs. Publish
When managing an API, you can either Save as Draft or Publish it.
- Save as Draft keeps your API in a non-public state, useful for development, testing, or internal review. It ensures only authorized users can access it while allowing modifications before release.
- Publish makes the API live and accessible to external users or applications based on access control settings. This is ideal when the API is fully developed, tested, and ready for use.
Both options help control API availability and ensure a smooth development-to-deployment process.
API Endpoint Tab :
The API Endpoint tab allows you to efficiently test and validate your APIs by providing various customization and validation options.
Modify Requests & Authorization Headers – Customize your request parameters and authentication settings to conduct different tests.
Change HTTP Methods – The default method is POST, but you can switch to other methods as needed.
Download in YAML Format – Export the API definition in YAML based on the OpenAPI Specification for documentation or further development.
API Access Control / API Authentication :
Please see Authentication and API Access Control Documentation for details.


